Category Archives: Water

Make Saving Water Part of Your Back-To-School Routine

backtoschoolkids2

Any parent knows “back-to-school” is one of the most chaotic times of the whole year. You’re trying to establish new bedtime routines so everyone is up and ready on time in the mornings, battling the fall clothing migration as you store summer items and retrieve fall items only to realize that none of the school clothes your children could wear in May will fit them now, and getting everything relating to backpack organization, school lunches, and art supplies ready (which theoretically is supposed to make your life easier…hahahahaha…) – so we understand that water conservation really kind of takes a back burner during all of this. However, it really doesn’t have to, and since we strongly believe in teaching children good water-saving habits, we’ve compiled this list of five simple ways you can work water conservation into your new school year routine. Wanna know the best part? Many of these tips will also save you some money!

clock

1. Use a timer for showers. Not only will this help save water by limiting everyone to 10 minutes or less in the shower, it can also help you keep everyone focused and on time in the mornings. If you shower in the evening, having a timer can also help speed things along at bedtime. Replace your existing shower head with a water-saving shower head for more water savings.

2. Reuse your towels. When you get out of the shower, you’re clean right? Instead of tossing towels into the hamper after each use, hang them up to dry and use them again tomorrow. Buy robe hooks or re-purpose an old coat rack to hang in the bathroom and designate a hook for everyone. Even most younger children can hang a towel on a hook much more easily than trying to fold and hang over a traditional bar, and it keeps the bathroom more organized and looking nicer than having a bunch of skewed, bunched up towels half hanging off the towel bars.

3. Be mindful of your other laundry. Some days you have to try on everything in your closet before you figure out what you really want to wear…or that you and your tween daughter both agree is appropriate for school…But are all those clothes dirty? Of course not! What about those jeans you wore yesterday? They could probably be worn again before needing to be washed. When undressing, evaluate what is actually dirty and what could be worn again before being washed, and you could save not only tons of water but lots of time and energy by doing less laundry. And who doesn’t want to do LESS laundry??? When you actually do laundry, also remember to set the appropriate load size and try to use cold water or try line drying to save more energy and water.

4. Encourage healthy eating and drinking water. We’re sure you do this for your kids already, but did you know that by eating fresh foods and drinking water you’re actually helping to save water and energy? glassofwater Generally, it takes a lot more water to produce processed foods than it does to actually grow fresh foods. Additionally, purchasing locally grown fresh fruits, vegetables, nuts, eggs, cheese, etc. cuts back on the amount of water needed to transport foods. We understand that not all towns or cities have a local farmers’ market and that sometimes this can be cost prohibitive, but it’s a choice worth considering and with careful planning and budgeting can be a positive, healthy change for your family. Another quick healthy tip that can potentially save you hundreds of gallons of water per year is to put a pitcher of water in the fridge for drinking instead of waiting for the tap to run cool. With this method, you can also add fresh fruits like strawberries, limes, or pineapple to infuse flavor in the water to help encourage kids to reach for a glass of water instead of sugary juices or sodas.

5. Consider the water footprint of products you use every day and try to make some changes. It’s a complex system, but water and energy are very closely tied together and it is sometimes difficult to understand how much water is really used to make the things we use all the time. Wherever you can, find ways to reuse or recycle things, or to create your own reusable items. Cloth shopping bags, reusable lunch baggies or containers, and reusable water bottles can replace their single-use alternatives to help save water. Now, we hear you saying – but doesn’t it take water to create and wash those too? Yes, it does, but the water consumed in creating and washing these reusable items is significantly less than what is wasted to create new single-use items. It’s estimated that it takes about 24 gallons of water to make one pound of plastic. Even if you buy a plastic reusable water bottle, you’re still helping to save water since that 24 gallons only has to be expended once instead of every single time you need water on the go.

If we focus only on one thing – packing lunches for school – think of all the ways you can save water…

savewaterschoollunch2

By making simple changes in our daily routines and making a concentrated effort to really think about how we use water, we can all start saving this most precious of resources. And although it might seem difficult at times, remember that every drop counts! Your small changes DO make a BIG difference!

Want to learn more about saving water around the house and find water-saving innovations to help you out? Check out our Guide to Water-Saving Plumbing Products.

Can I Use a Brick In My Toilet to Reduce Water Waste?

A lot of people are finally starting to realize the impact humans have on our clean water supply and have become more conscientious about how they use water and how much water they use. One question we see frequently asked online is – can I put a brick in my toilet tank to help conserve water?

This is a valid question for anyone wanting to save water, as the toilet uses nearly 1/3 of our indoor water consumption, and technically, yes you could…but we really don’t like to recommend that. While we here at PlumbingSupply.com truly care about water conservation and try to do our part to save water and help others to save water, putting a brick in your toilet isn’t the way to do it.

All toilets manufactured after the early 90’s use only 1.6 gallons per flush (gpf) or less, with many of the newest models using 1.28gpf. Older toilets do use significantly more water, with most being 3.5gpf, but some using up to 6gpf – that’s a lot of clean water being flushed – but it’s important to understand that these toilets were specifically designed to use that much water and they typically won’t flush properly with less. And yes, we completely understand that your toilet LOOKS just like the low flow toilets…from the outside…and that this can be confusing for many people. Trust us, the inner workings can be significantly different. An extra bend or an extra inch of height in the toilet trap can mean a lot when you’re moving waste with only water and gravity.

Same model, made in different years. Can you tell the difference?

Old Toilet

Old Toilet

New Toilet

New Toilet

For sanitary reasons, you really want all that waste to be disposed of properly and not stuck in your toilet trap or your home’s sewage line. So, it’s important that the correct amount of water is used to help that waste move along the sewage lines and help prevent clogging – which means you really shouldn’t use a brick, or anything else for that matter, to reduce the amount of water in your tank.

We’re aware that there are plenty of articles out there telling you otherwise – that it’s perfectly fine to displace the water in your toilet tank to help conserve and that your toilet will flush either way. Which is true, in most cases. Your toilet WILL flush, but it won’t be doing so effectively. And that opens up the potential for serious problems in your home or community sewage system down the road.

If you’re concerned about water conservation and have an older toilet with a higher flush rate, we strongly recommend you replace the toilet with a newer, water-saving model. That is the most effective method of saving water when it comes to toilets. Also, regardless of whether your toilet is new or old, making sure you check periodically for leaks and repair them quickly can also save significant amounts of water.

However, IF you choose not to replace your older toilet and you choose to use the “brick method”, it is a better idea to take a plastic water bottle and fill it up with sand or small pebbles and place that in the tank instead of a brick. Even a brick wrapped in plastic can break down in the tank, especially if you get a hole or loose seal in the plastic wrap.

Want more water-saving ideas? Check out our Guide to Water-Saving Plumbing Products for tips to help you conserve!


10 Tips for Preventing Toilet Troubles

This article can now be found at thePlumber.com

Today is World Health Day!

nomosquitos At PlumbingSupply.com®, we care about the health of our employees, our customers, and our nation. The prevalent topic for this year’s World Health Day is something many Americans may not have heard of, but is definitely cause for concern. Dengue fever and severe dengue are similar mosquito-borne infections that originated in tropical and sub-tropical regions, yet have spread in recent years to milder climates. Most of us have probably heard about malaria and West Nile disease, both of which can be extremely dangerous for young children, the elderly, and individuals with compromised immune systems, and dengue is a similar type of disease that can sometimes prove fatal to these same groups of people. The World Health Organization currently estimates that over 40% of the world’s population are at risk from dengue.

However, knowledge is power when it comes to dengue. Early detection of the illness can be critical to receiving proper medical care. Dengue fever should be suspected when a high fever (40°C/104°F) is accompanied by two of the following symptoms – severe headache, pain behind the eyes, muscle or joint pains, nausea, vomiting, swollen glands, or a rash. As most parents know, young children should receive medical attention for a high fever or any of these symptoms, regardless of whether dengue fever is suspected or not.

Severe dengue is a potentially deadly complication of dengue fever, and typically occurs about 3-7 days after the symptoms mentioned above appear. The infected person may experience a decrease in their fever, accompanied by severe abdominal pain, persistent vomiting, rapid breathing, bleeding gums, fatigue, restlessness, or blood in their vomit. Medical care must be sought right away to help avoid further complications and the risk of death.

Currently, there is no vaccine to protect against dengue, but the situation is far from hopeless. There are a number of things you can do to help prevent the spread of dengue – and to help your family avoid getting bit by infected mosquitos. The World Health Organization and the CDC recommend:

  • Placing screens over open windows and doors when you’re indoors and using appropriate mosquito repellents like smoke coils, citronella candles, etc. when you’re outside
  • Avoiding outdoor activity during dusk and dawn when mosquitos are most prevalent
  • Wearing light-colored, long-sleeved shirts and pants instead of shorts, and using DEET or picaridin based repellents on exposed skin and clothing (apply repellents sparingly on exposed skin, especially on children)
  • Covering, emptying, and cleaning any water storage containers or areas where standing water can collect on a weekly basis – this includes areas both indoors and outdoors such as bird baths, pet or animal water dishes, rain barrels, flower planters, vases with fresh flowers, rain gutters, children’s wading pools, etc.
  • Sleeping under a mosquito bed net, as mosquitos are very active at night

Mosquitos carry many diseases, of which dengue is only one. Generally speaking, taking steps to avoid or repel mosquitos and to eliminate their breeding habitats (standing water), will always be healthful for you, your family, and your neighbors.

How To Install a Kitchen Faucet – Video

Plumbing is intimidating for most people, especially when it comes to the kitchen. Think about it – you may have your main kitchen sink with a faucet, a prep sink with its own faucet, a pot filler faucet near the stove, a dishwasher, a refrigerator ice maker, drinking water filters, and more going on in there – and many of these things could be connected to one another. However, plenty of the typical things homeowners want to do with the plumbing in their kitchens are easy enough for a proficient DIY’er to handle.

One of the easiest kitchen upgrades you can do yourself is installing a new faucet. While certain situations may be trickier than others, faucet installation isn’t rocket science. Join our go-to guy, Mike, as he walks you through everything you need to know to make your kitchen faucet installation go smoothly.


5 Easy Plumbing New Year’s Resolutions

This post can now be found at thePlumber.com

Dry Fitting PVC Connections

Example of a PVC elbow connected to a section of PVC pipeSeems like a great idea, right? Fit everything together for your sprinkler system (or laundry-hamper-holder) so you know exactly how long the pipe needs to be cut, then take it apart and glue back together permanently.

Unfortunately, it doesn’t work that way.

If you dry fit PVC plumbing connections, you’ll wind up with PVC fittings that only allow the pipe to go in part of the way, rather than all the way like they will when you’ve got them all gooey with glue.

Why not, you ask? It works with Legoes, wooden dowels, puzzles, the tile you set last weekend, and all sorts of other stuff you’ve done before. What’s so special about PVC plumbing fittings that they won’t let you test out your design precisely? What happened to measure twice, cut once? Are you doomed to have to hire a pro or screw up over and over?

Photo of a PVC wye fitting

A PVC Wye Fitting

Not necessarily, but let’s explain a bit about PVC plumbing fittings and then go from there.

(Hold on, need a disclaimer here: If you don’t know what you’re doing, a pro really might be the best idea – they can usually do it faster, better, and with far less frustration than a newbie. If you do hire a plumber instead of tackling the project all alone this time, take the time to watch what they do and you might learn something new – hey, you could consider it an educational investment! And, as always, consider the bad things that could happen if the project fails…. )

PVC fittings are designed to connect to PVC pipe by interference fit, also known as a press fit or friction fit. What this means is that the fitting is designed so that it does not exactly match the pipe – the hub of the PVC plumbing fitting is actually tapered a bit to make an extremely snug fit so there’s no gaps for PVC glue/cement to fill in. This is a good thing when you think about it (hmm… incomplete seal = leaks = bad).

Why is this important? Despite the name, PVC glue is not glue at all. It’s actually a solvent that kind of liquefies the PVC it touches so the pipe and the fitting will essentially melt together where they are “glued”. Think of it like welding metal – same idea but with chemicals instead of a torch (and less chance of catching things on fire). Once cemented together and the connection has cured, the pipe and fitting are no longer separate pieces, which is what makes a properly cemented PVC connection virtually leak-proof. Also, since you’ve got cement gooped on, the fitting slips in much easier. Learn more about PVC and PVC cement here.

Okay, so we know why dry fitting PVC plumbing fittings won’t work the way you want, but what to do about it? Surprisingly, the answer is incredibly simple: use a ruler or measuring tape.

Image pointing out the stop lip for pvc pipe

Pipe will fit snugly against this lip if properly placed

No, seriously – check out the inside of a PVC fitting (or click on the picture to your left); you can see where the end of the pipe will be once properly cemented and inserted. Simply measure from that point and you’ll quickly find out how much pipe you’ll need to get to the next fitting. Some people have a good eye for how the pipe will fit by just looking at the outside of the fitting and can simply line up the pipe and fitting right next to each other and go from there.

Please note, different PVC fitting manufacturers might have slightly different hub lengths, so if you’re sourcing your fittings from multiple vendors and need a high degree of precision, you might want to measure each fitting. If you’re sourcing all fittings from the same manufacturer, you shouldn’t need to check every fitting, but we would recommend checking at least one from each different type of fitting (90 degree elbow, tee, side outlet 90, coupling, etc) and size. It’ll only take a minute and will really help make the project go much more smoothly.

Now that you know how to “dry fit” your PVC plumbing fittings, get out there and finish those projects!

Your turn: what’s the most useful thing you’ve learned about working with PVC?

Finding American Standard Toilet Parts

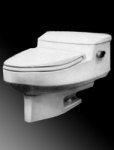
Example of an American Standard Roma series one piece toiletAmerican Standard Brands, as it’s known now, can trace its beginnings to 1872, when the first bit that was to become a plumbing fixture empire was purchased. Over the years, the company has expanded, eventually merging with other companies including various sanitaryware companies like Porcher, Jado, Crane (previously Universal Rundle), and Eljer. These brands are, at the time of this writing, still marketed as separate brands, though virtually all customer service functions have been consolidated under the American Standard Brands banner.

What does this mean for you? Surprisingly, not as much as you might think. Sanitaryware companies have come and gone, merged and spun off since the first toilet manufacturer produced its first toilet. This is nothing new, though it can be frustrating at times.

But eventually, like all toilets, you encounter a problem. Perhaps it’s just a little leak, but as we all know, little leaks can cause big problems. So, if you’re ready to deal with your little leak before it becomes a huge headache, read on!

Now, for the purpose of this post, we’re assuming you know you have an American Standard toilet but don’t know what replacement parts you need to get it back in perfect working order. That’s where we come in. We’re your source for information and parts – we’ll help you find what you need to know to identify the parts for your particular toilet.

First step, carefully remove the tank lid and set it aside somewhere safe. A broken tank lid will only add to your toilet issues, so let’s not go there right now. Though, should you need a replacement lid, we can certainly help you!

Second step, look inside your tank. Lots of interesting stuff, right? Some of the parts probably even look like things you’ve seen on the store shelves.

Photo of an American Standard acutating unit (flush valve) model 47086Here’s where it can get tricky. Some American Standard toilet parts are easily replaceable by “universal” or non-OEM parts as they are fairly standard styles. However, some American Standard toilet parts are unique to a particular model and won’t be so easily replaced.

So, while you’re looking in the tank, see if you can find letters or numbers impressed into the side of the porcelain tank. We’re looking for model numbers, and American Standard model numbers typically have four digits, most often starting with a 2 or a 4. This will be your tank number or your toilet model number, and will determine what toilet parts will fit properly and work the way the manufacturer intended.

Example of a hand painted American Standard toilet tank lidIf you don’t see anything on the inside of your tank, try looking on the unfinished underside of the tank lid – again, very carefully. The model numbers are often repeated on the tank lid, sometimes with additional number/letter combinations and even dates!

Once you have those numbers, you can begin the hunt for the right parts. We show parts breakdowns for many American Standard toilets on our site, and offer a wide variety of replacement toilet parts, from the old actuators to the newer flush valves. We’ll help find what works for your toilet. Even if we don’t list it, we can probably get it or recommend a good replacement for a discontinued part.

Once you have the parts you need, the fix is as good as done. Take an afternoon, call a friend, order pizza and get that toilet taken care of! Oh, and just in case you ever need the info again, make sure you keep your parts list in a safe place.

Your turn:  What’s your best/worst toilet repair story?